
Airwallex Payment Gateway Addon
BookingPress provides integration for the Airwallex Payment Gateway enabling your users to pay using Airwallex. Airwallex is a global payment platform that allows businesses to accept online payments in multiple currencies, making it ideal for international transactions.
Airwallex Integration:
To get and Activate Airwallex Payment Gateway, please follow the below steps.
- First, login to the BookingPress Website, and you will be redirected to the My Account page.
- Now, click on the “Access Passes” link from the left menu panel.
- After going to the Access Passes, click on the “View your downloads” button.
- From the list, please look for the “Airwallex” add-on, click on the download button, and it will automatically start downloading the addon. After the download is finished, upload the downloaded zip file to WordPress just link any other WordPress Plugin, then install and activate the addon to use it.
Once this is done you can head over to BookingPress > Settings > Payments. Here, simply enable the Airwallex Payment Gateway and enter the credentials such as Client ID, API key, and the Webhook Secret for the same.
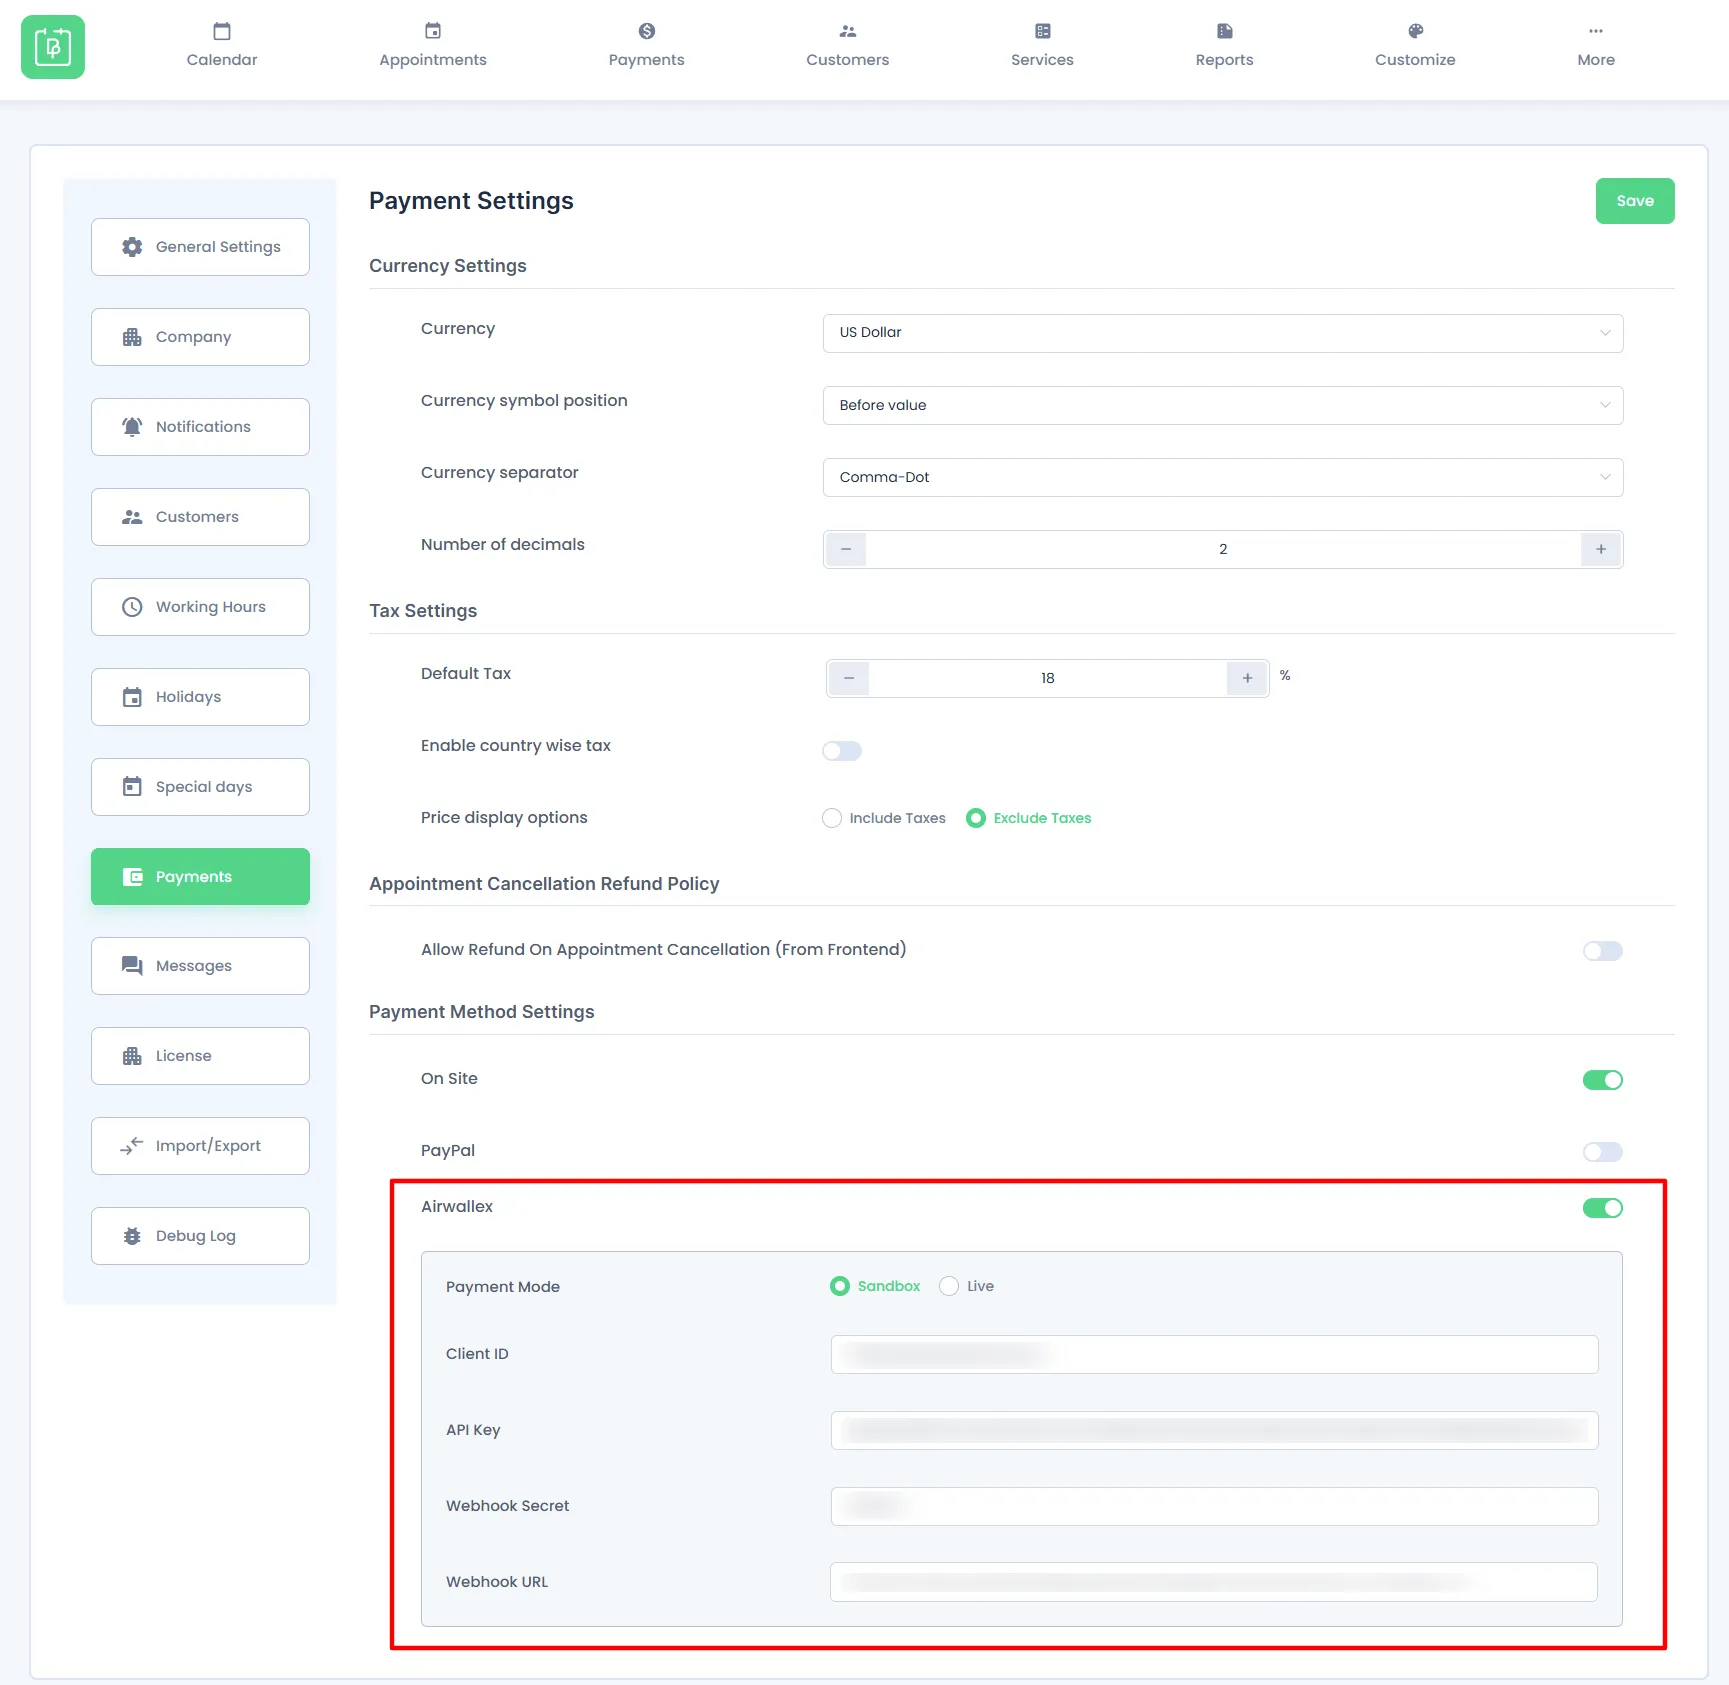
Note: Please make sure that you are using Sandbox credentials in Sandbox mode and Live credentials in Live mode.
How to Retrieve Your Airwallex API Key and Client ID
To obtain your API Key and Client ID, you first need to log in to your Airwallex account here. If you don’t have an account yet, you can create one here.
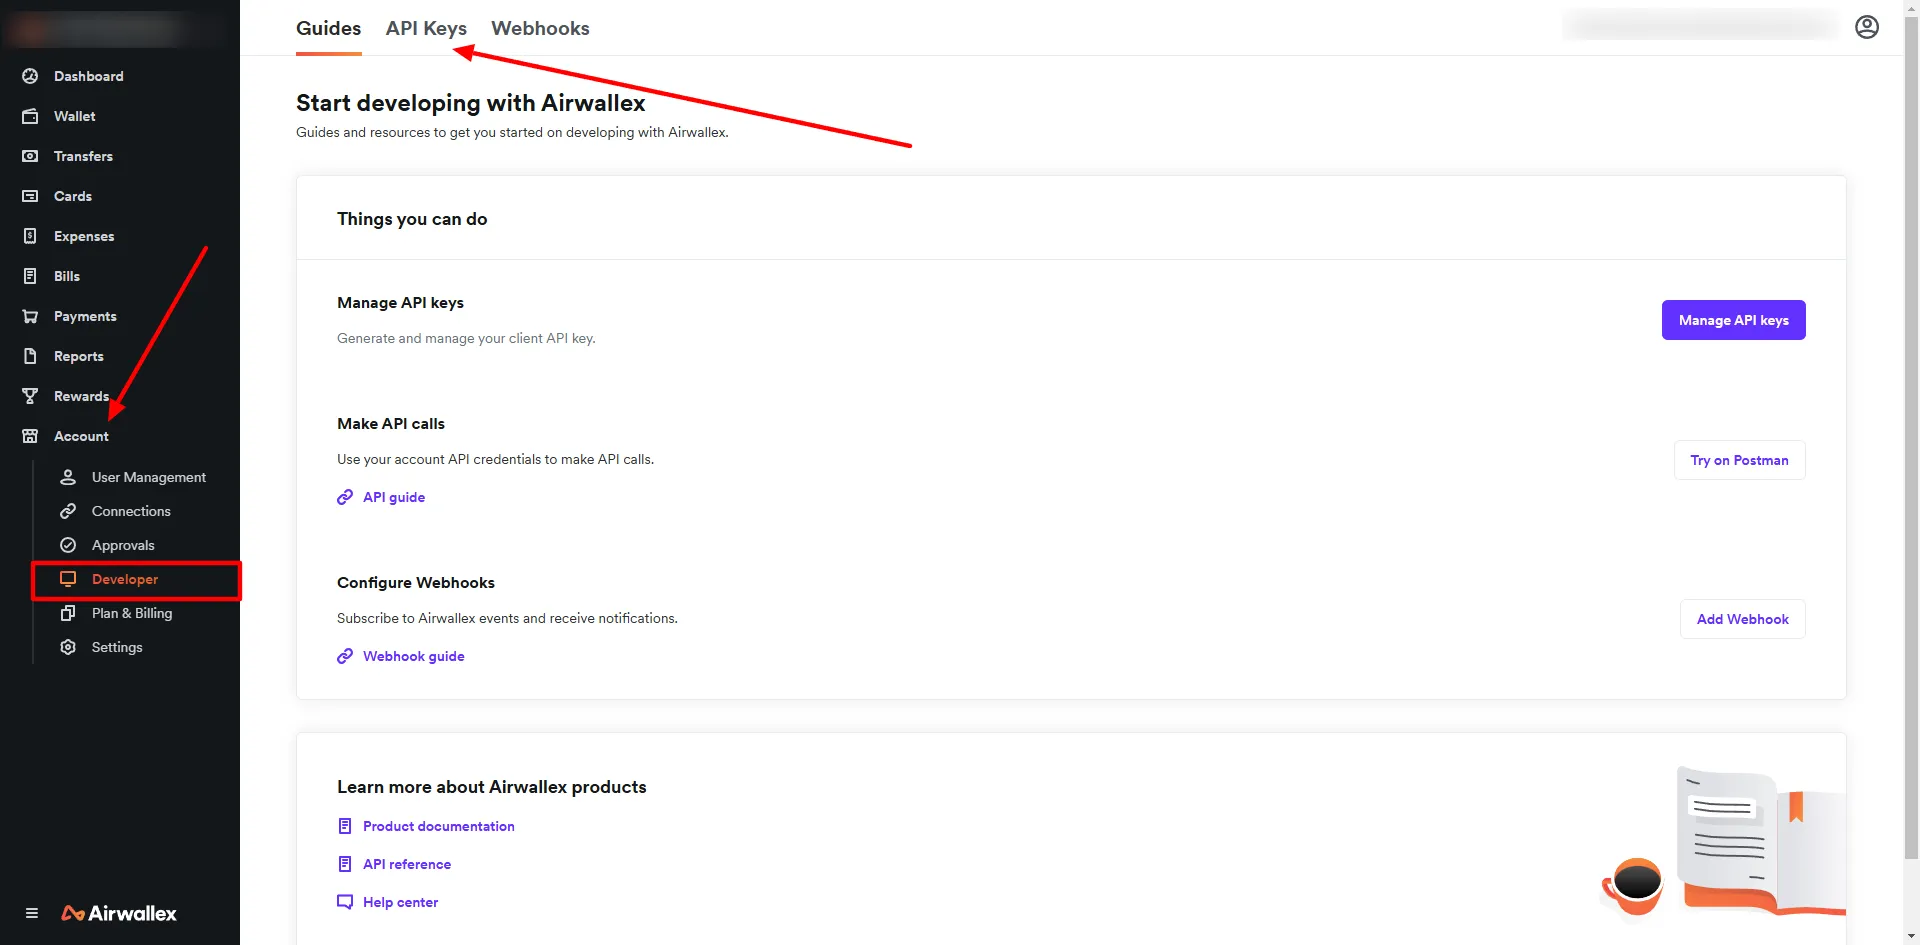
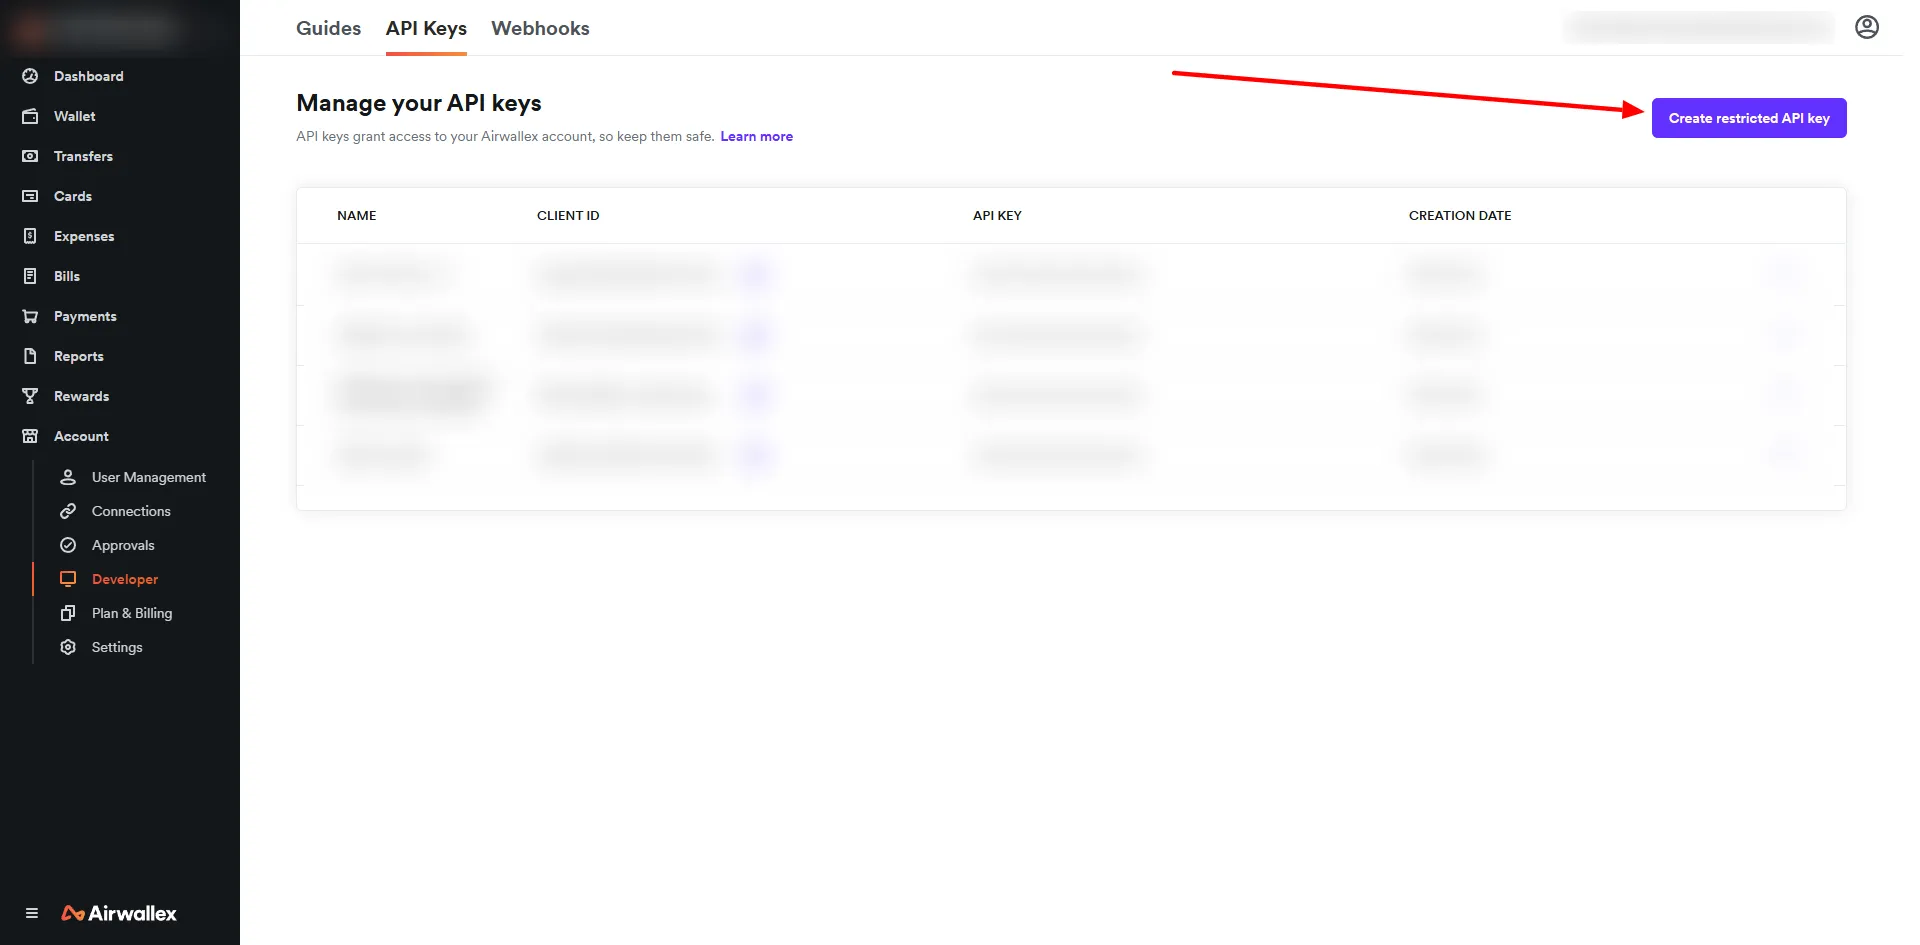
After logging in, go to the Account section in the sidebar, then click on Developer. Once you’re in the Developer section, select API Keys from the top menu.
You can manage your API keys here. To create a new API key, simply click on the “Create restricted API key” button.
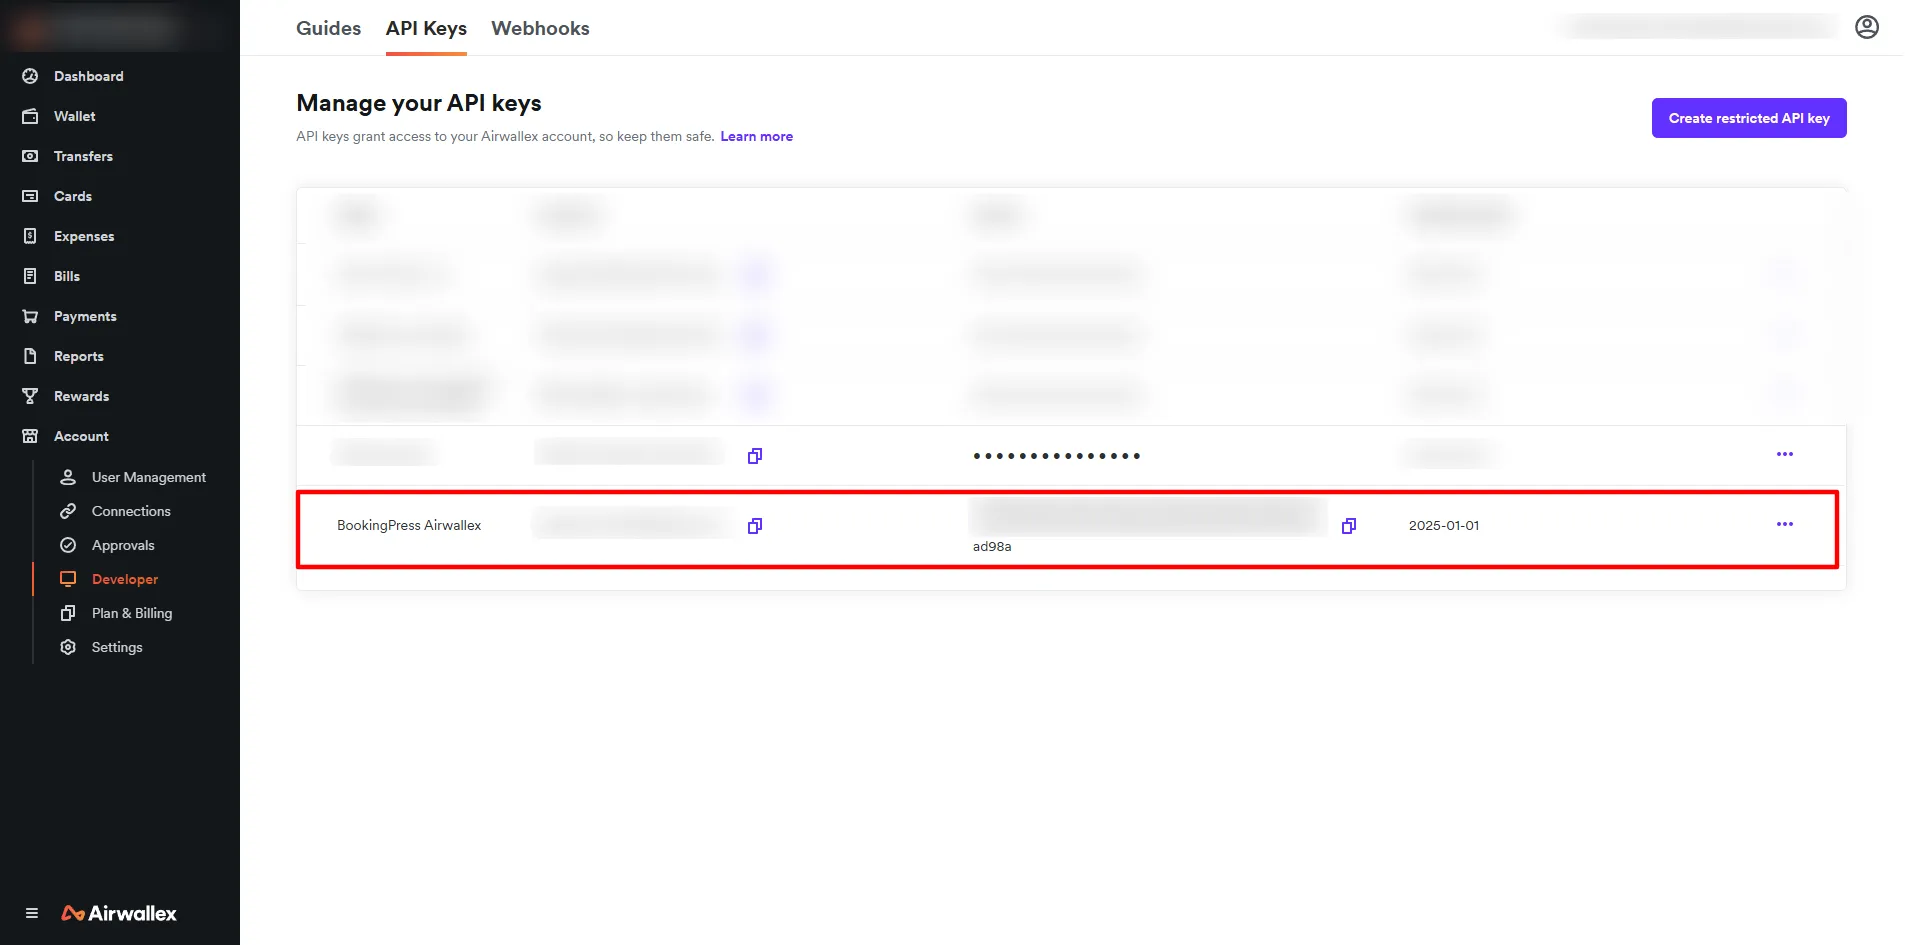
Enter a name for your API key, and ensure you select all the checkboxes for Edit and View permissions, except for Invitation Links and Hosted Flows. Then, click Create API to generate your key.

After clicking Create API Key, the new API key will be generated. You’ll see both the API Key and Client ID. Be sure to copy the Client ID right away, as it will be hidden later and can only be regenerated. Then, paste both the API Key and Client ID into BookingPress > Settings > Payments.
How to get the Webhook Secret and Setup Webhook for Airwallex
Once you have your API keys, you can proceed to set up the Webhook. In the Airwallex dashboard, navigate to the Webhook section from the top menu. Here, click on the + Add Webhook button.
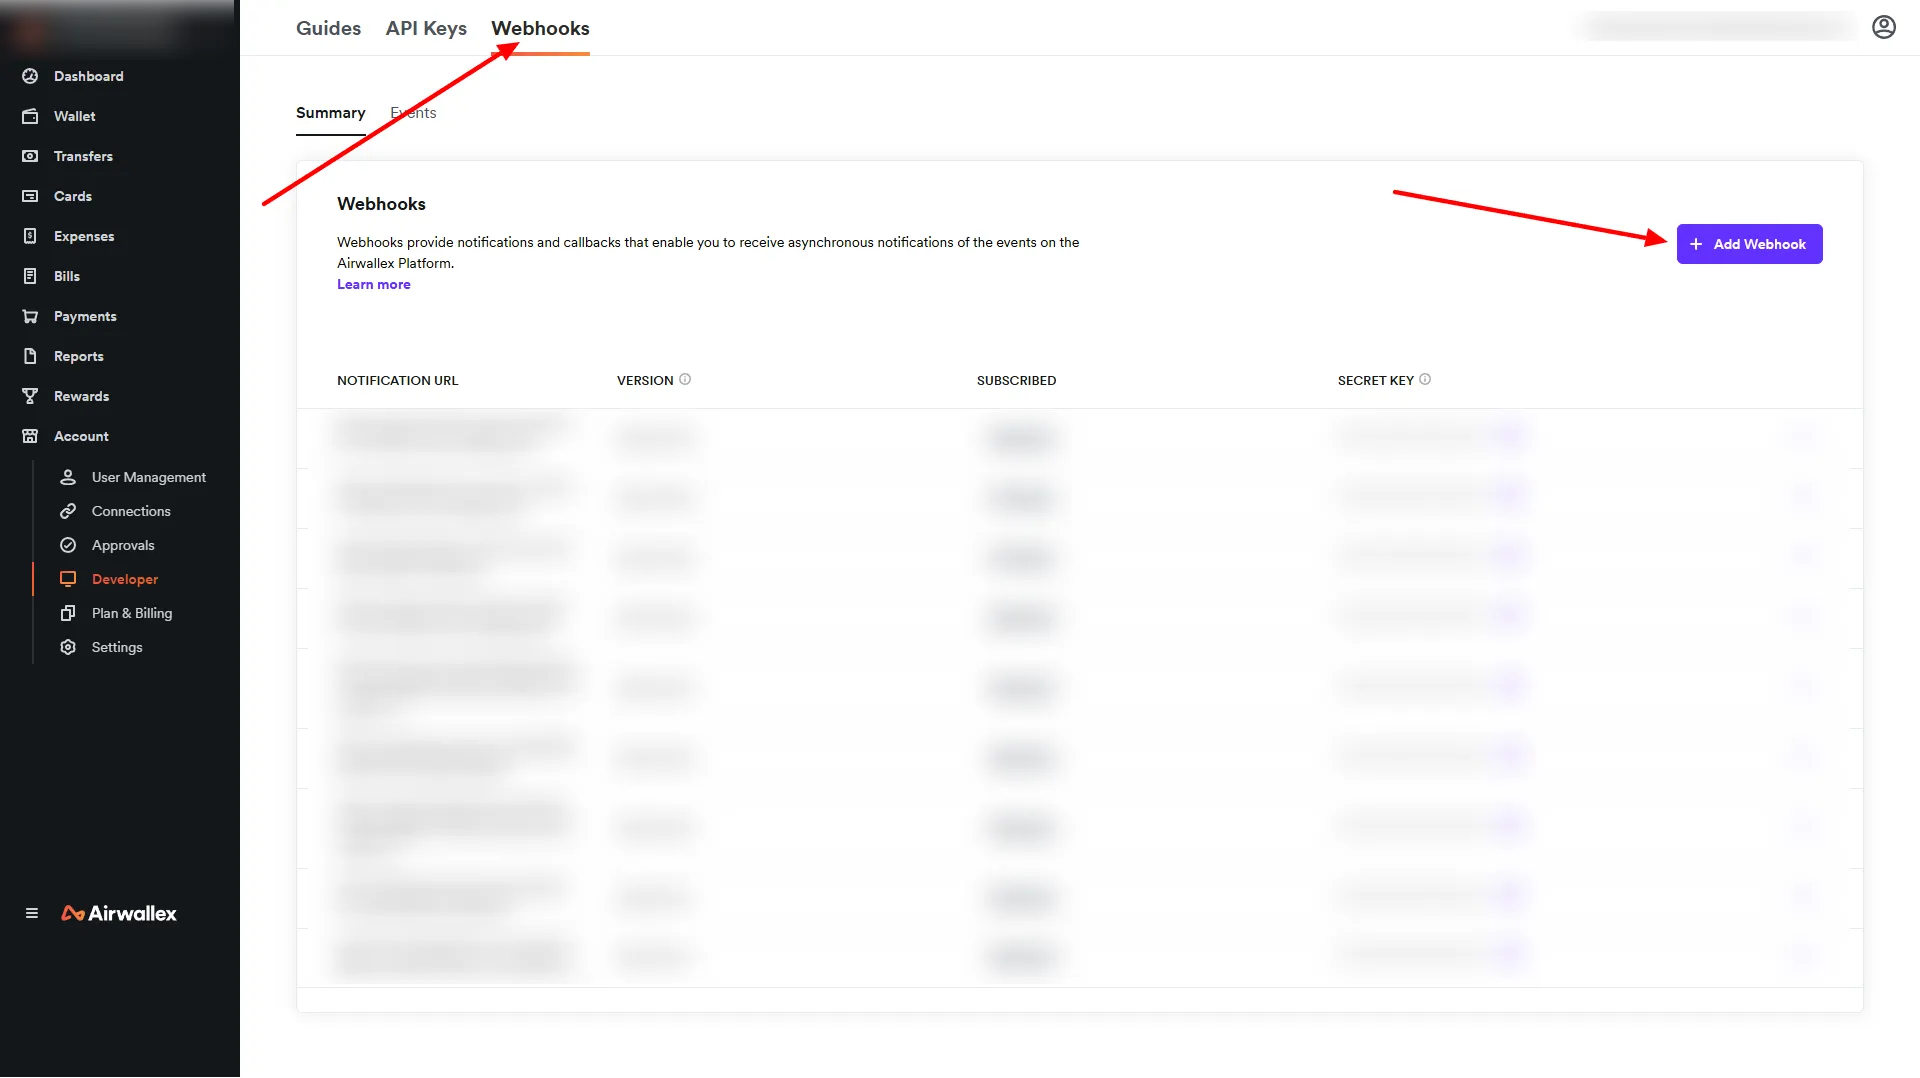
You will be prompted to enter a Webhook URL. To get this URL, go to BookingPress > Settings > Payments in your WordPress dashboard, where you’ll find the Webhook URL under the Airwallex section. Copy the URL and paste it into the Notification URL field in Airwallex.
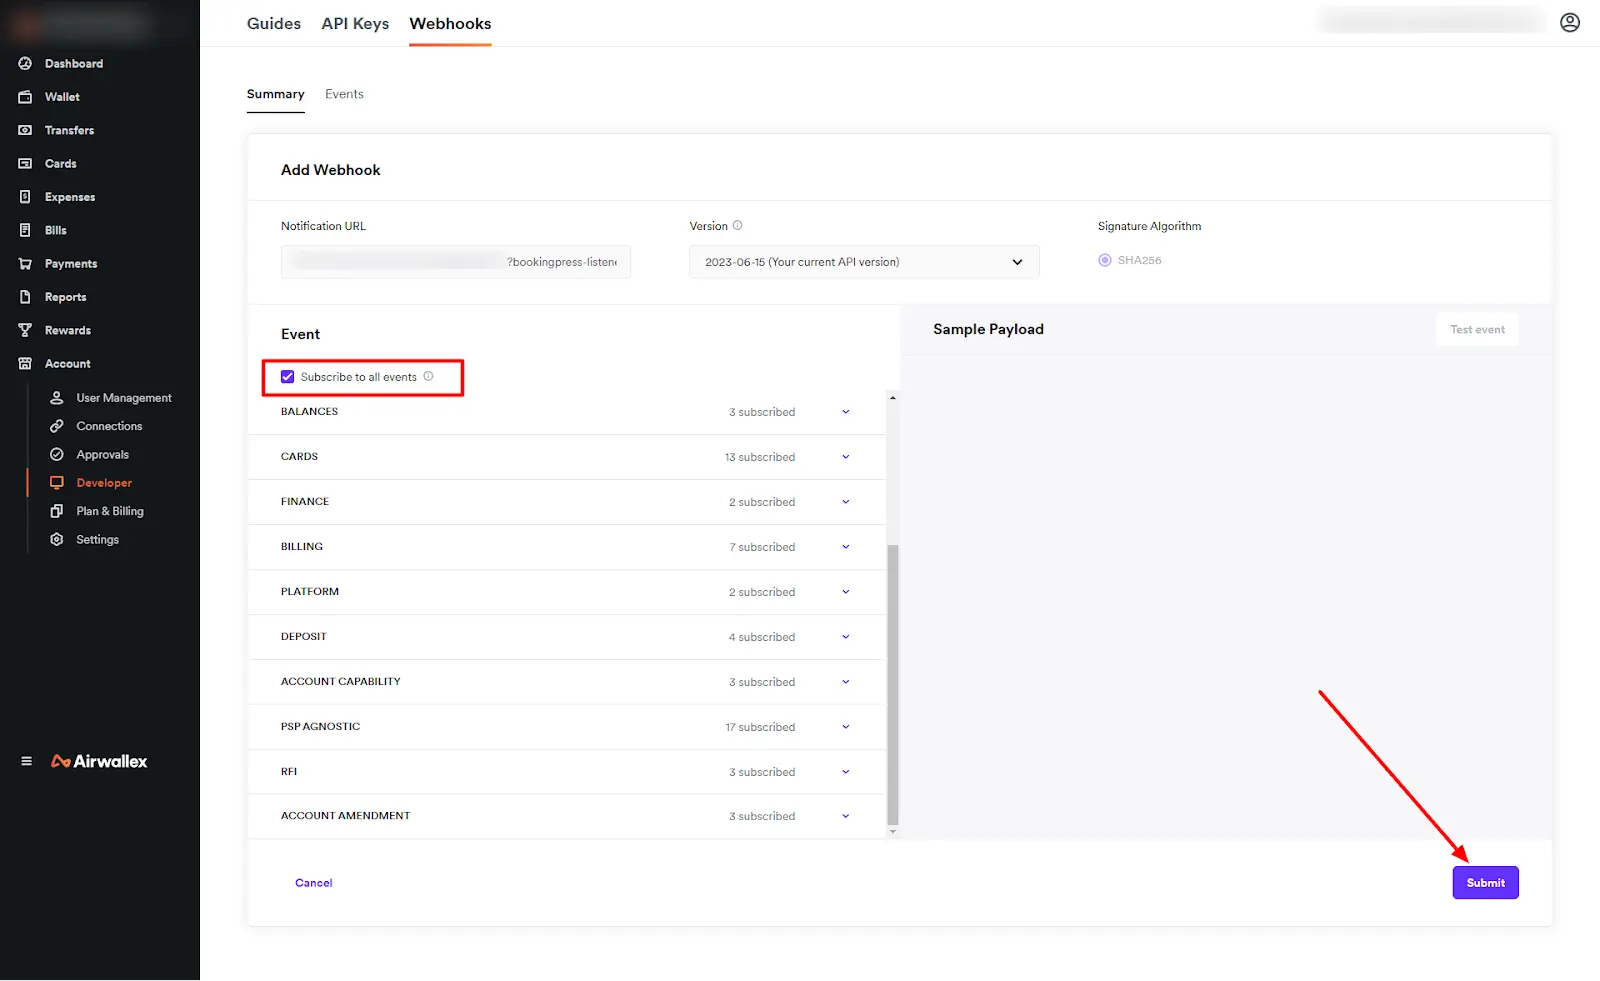
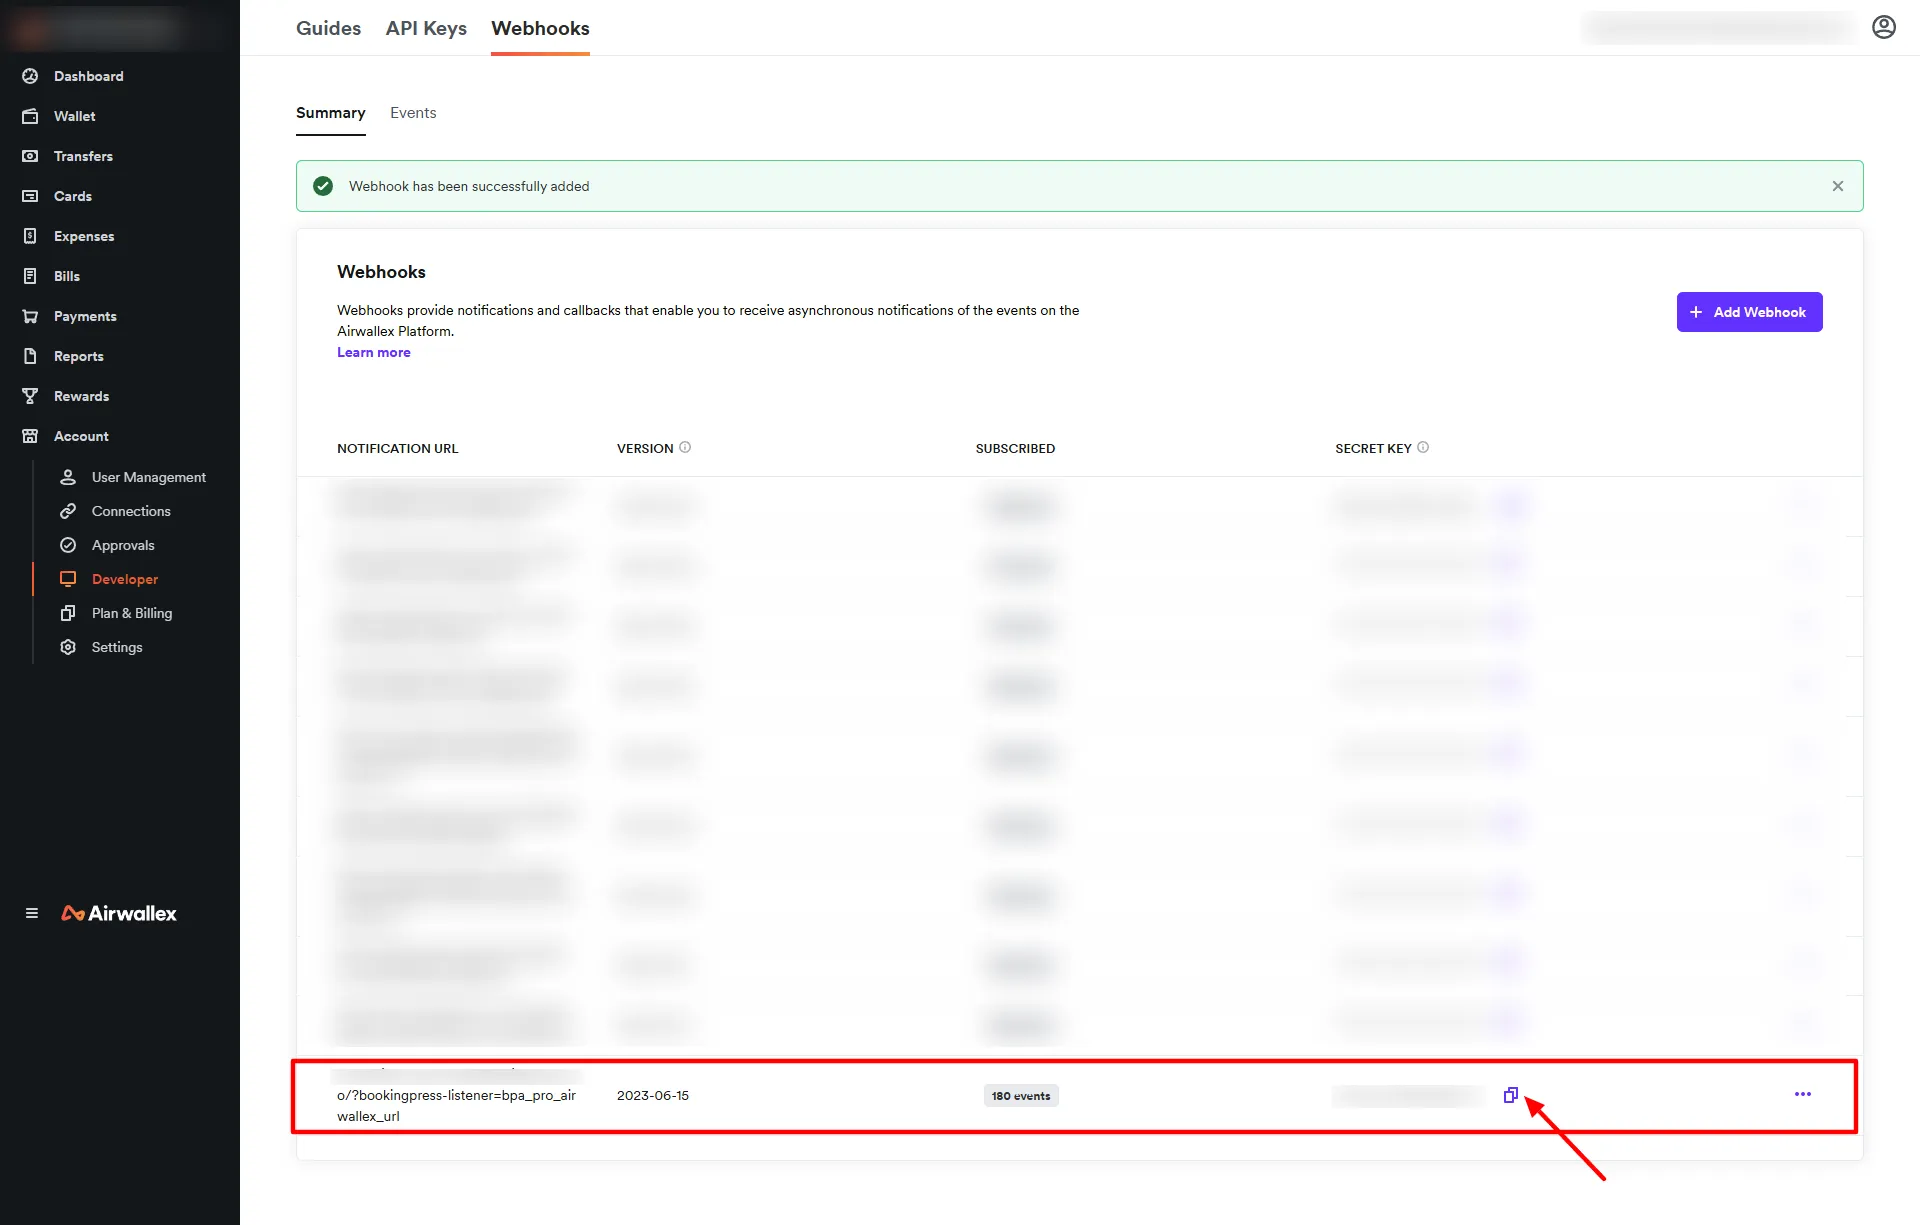
For the Version, select Your Current API version. Then, check the box to Subscribe to all events so that you receive all relevant notifications. Finally, click Submit to complete the webhook setup.
Once you click Submit in the Webhook setup, you’ll be redirected back to the Webhook page where you can see the newly added Webhook Notification along with the Secret Key. Copy the Secret Key and paste it into BookingPress > Settings > Payments. Under the Airwallex section, simply paste the Webhook Secret in the designated field.