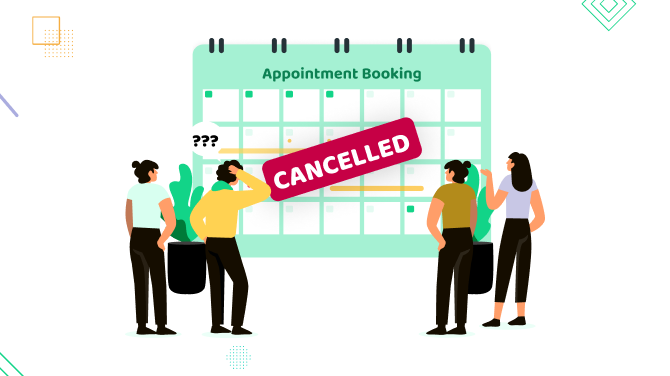
How to Add an Online Booking System to Your Website in 6 Simple Steps

Add a powerful, payment-enabled online booking system to your WordPress site in 15 minutes! With our simple tutorial, you will create an appointment scheduling form with dynamic pricing conditions, multiple staff members and services, availability under your control, and full monetization through payments and automated marketing. Interested?
To follow this simple tutorial, you need to have:
- A WordPress site is installed on your hosting, and login access to it.
- WordPress theme installed.
- The BookingPress plugin, which is an online booking system for WordPress.
We’re getting started.
Step 1. Install and Activate BookingPress
Let’s start with the basics!
- Purchase BookingPress Premium (to use all features without restrictions), then go to the BookingPress website → My Account → My Download to get the plugin ZIP.
- In your WordPress admin, go to Plugins → Add New → Upload Plugin, and upload the ZIP file.
- Activate your license key by logging in to the BookingPress website, and go to Purchase History → Click the key icon to copy your license code.
- In WordPress, go to BookingPress → License, select your package, paste the key, and click Activate License.
Done! Your BookingPress Premium is ready to use. As for add-ons, which in essence are extra features, you can also manage them through your account.
Next, it’s up to you what to add first – services or people who provide them. The online booking system by BookingPress will work in both cases.
But we now want to begin with the schedule, shift, and availability management, which requires creating staff members in the plugin.
Step 2. Add Staff Members
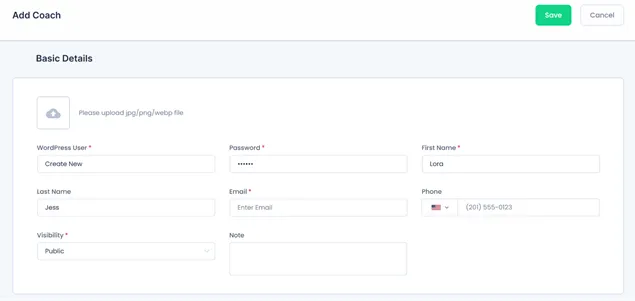
Add people via BookingPress → Staff Members → Add New.
It’s possible to create multiple staff members for any number of locations and areas.
For every person, there are many settings you can customize to create an individual workflow for them.
- Choose a WordPress user or create a new database of service providers. Fill in personal data, such as name, email address, phone, and optionally an image (customers can see a photo of your staff when making a booking, which can greatly drive bookings!).
- If you haven’t created any services yet, skip the step of adding them, you will assign them later. Note: In case you have services added, the selection of assigned services is required.
Availability management
Naturally, you want to create working hours for staff so that customers always know real-time availability, which correlates with made bookings.
In BookingPress, you can add the following availability:
The same for all staff/company:
Go to BookingPress → Settings → Working Hours. Here, you can set a common schedule for 7 days of the week, including breaks.

To set up holiday breaks, go to the Holidays menu and set up one-time or recurring holidays (when your booking calendar will show blocked days).
For individual staff-based schedules:
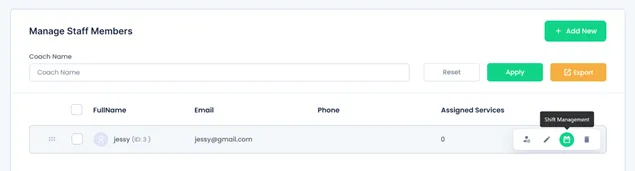
Go to the list of added staff members → choose one and hover over the settings → click Shift Management.
Then, enable ‘Configure specific working hours’ to customize an individual schedule and show only this specific availability for the chosen person.
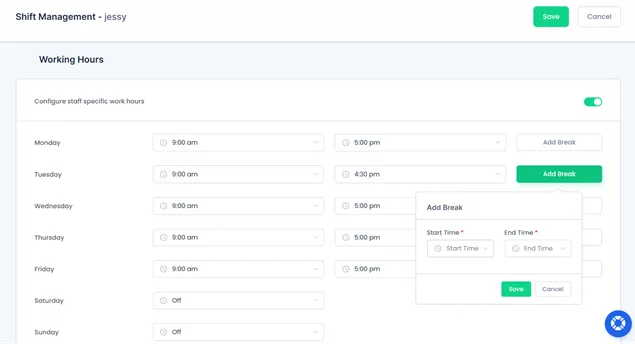
To add more blocked availability rules, add days and special holidays.
Staff member accounts
If you’ve got many staff members and want to do all of the work autonomously, e.g., manage their payments, bookings, and clients, it makes sense to provide them with individual staff accounts. That said, BookingPress has all you need to make it real.
Go to BookingPress → Settings menu to further add some configuration for staff member accounts. For example, define such options as:
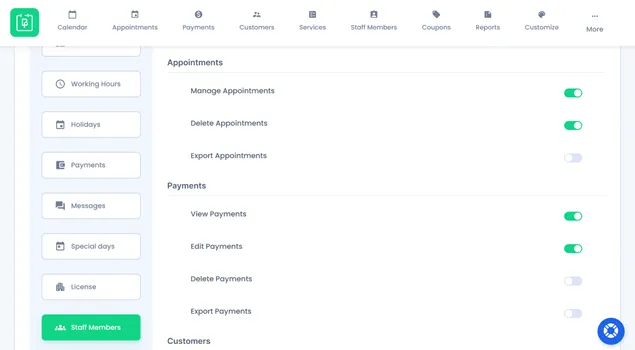
- Appointment control (e.g. delete, export).
- View, delete, and export payments and customers.
- Manage their schedule and working hours.
- Add a custom label to staff members, which is displayed in the booking form.
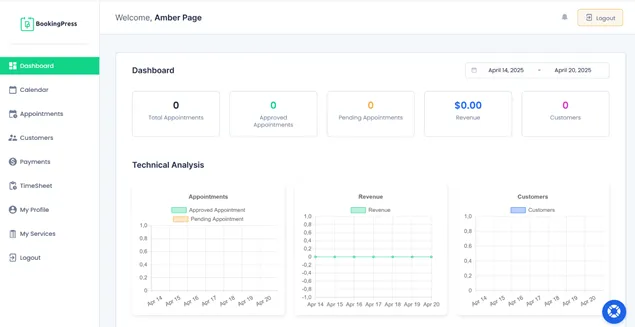
Having an individual login account, they can work without being overloaded with data from other colleagues. There are a lot more tools to discover and simplify the work of your staff using BookingPress (customers can even rate staff members!). View all these tools in the free demo (click Staff Member Demo).
Now, we are jumping to the services you will sell as per the availability setup.
Step 3. Add Bookable Services & Assign Staff
Next, you are ready to create your first offering that you can sell online through BookingPress → Services.
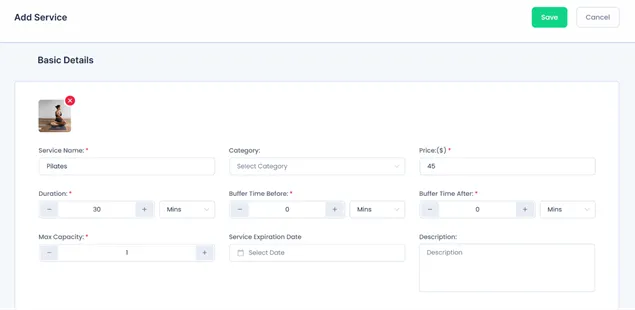
As you see, this offering is referred to as a ‘service’ in BookingPress. It works only if you set the required parameters to it as follows:
- Service name.
- Service price & currency.
- Duration, including buffer times. Dynamic and variable appointment duration is possible with the Custom Service Duration add-on.
- Max number of customers that can be present at the appointment (can be customized per staff).
- Assign staff members who provide the offering.
It will suffice for the basic configuration! But if you want even more flexibility, use extra options for the service customization, including:
- Service description and image.
- Expiration date.
- Minimum time before booking.
- Minimum time before rescheduling.
- Minimum time before cancelling.
- Service category for proper categorization.
Note: the good of BookingPress is that you can activate and deactivate the needed features via the add-ons menu on the plugin dashboard. You will discover dozens of features – this is going to be your favorite menu!
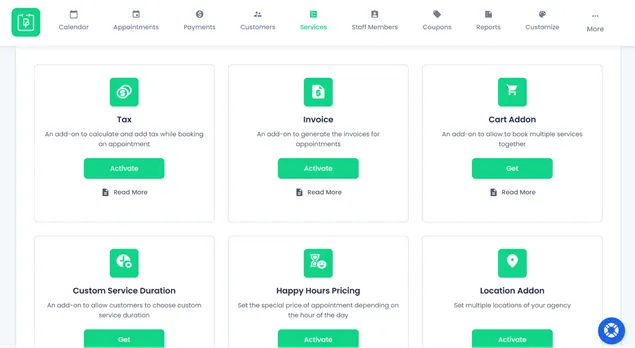
For example, you can make appointments recurring, set up dynamic pricing based on the time of the day, allow clients to choose service duration (e.g. how long the massage or lesson will take), and more. Services can also be provided in different locations – use the Location add-on for this.
Step 4. Enable Online Payments & Set up Booking Confirmations
If your booking system should accept payments online, feel free to connect payment providers you are already using for your business.
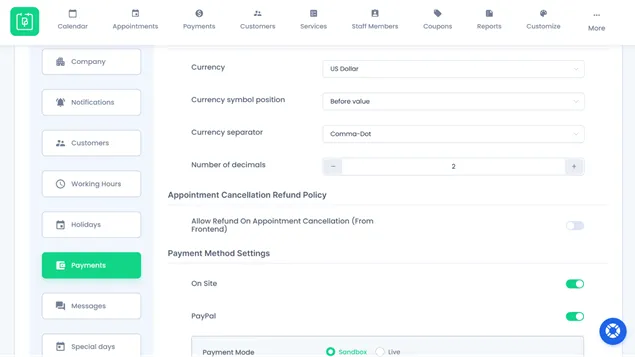
With the selection of 20+ payment gateways and WooCommerce, will you feel limited? Not a chance. To connect them in BookingPress, simply go to the Settings menu > Payments.
The options available to you depend on your BookingPress plan and add-ons enabled. Go to the add-ons menu to find all the methods you need, including:
- PayPal
- Stripe
- Square
- Authorize.Net
- Mollie
- 2Checkout
- Razorpay
- Braintree
- Klarna
- Skrill
- PayFast
- PagSeguro
- WorldPay
- PayUMoney
- Paystack
- Paddle
- Mercado Pago
- ECPay
- PayMongo
- Airwallex
- Payson
- PayUbiz
In the settings for payments, you will also be able to customize many important things like currency, enable refund options, etc.
BookingPress can also manage deposits, taxes, invoices, coupons, gift cards, waiting lists, and even connect to POS using add-ons. All you need to do to enable these features is to enable the respective add-ons and set up your preferences for them.
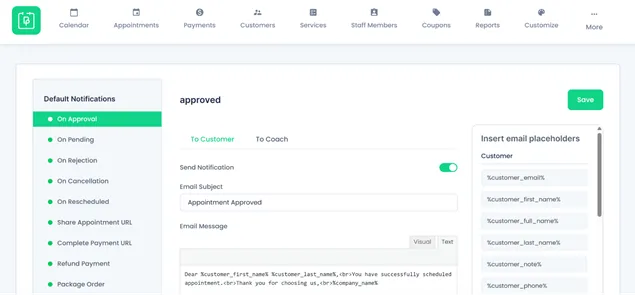
Step 5. Customize Automated Notifications & More
To send email and messages upon bookings, simply add your templates and configure settings through the Notifications menu. There you’ll see samples for all common triggers, such as appointment confirmation, cancelation, etc.
You may also wire up WhatsApp and SMS to send notifications in a more convenient way.
Step 6. Add a Booking System to Your Site
Before you add a booking form to your site, make it more branded! You can customize button labels, the appearance of the steps, titles, and descriptions for steps, etc.
Navigate to the Customize menu in BookingPress and go through numerous settings. For example, as for the styling options, you can update:
- Fonts styles.
- Background and text colors.
- Set colors for price and submit buttons.
- Optionally add custom CSS.
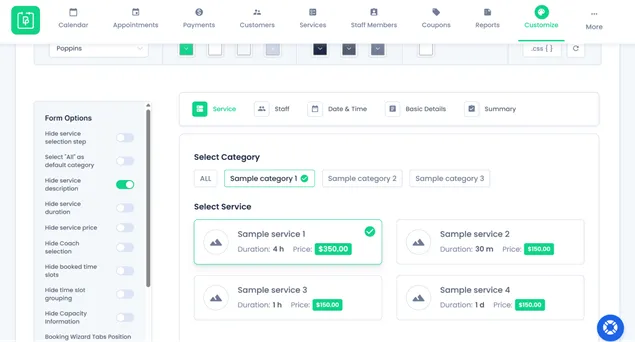
You also want to customize the booking workflow, right? For the booking form step options, it’s easy to toggle visibility for:
- Service selection
- Booked time slot
- Service duration & price
- Staff member selection
- Time slot grouping
Need to change the client booking system navigation experiences? Customize the following:
- Choose whether clients select staff or services first.
- Add custom fields to the form.
- Place booking tabs on the left or top.
- Enable search on Service, Staff, or Location steps.
- Hide capacity info, groupings, or booked slots.
- Show a message or redirect users after booking.
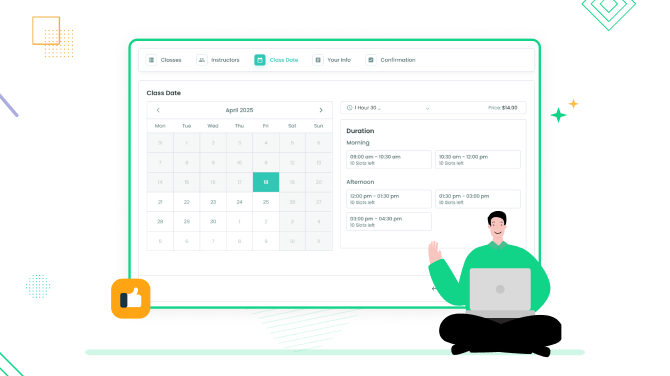
To actually make the booking system appear on your WordPress site, use your favorite page builder or the WordPress block editor; BookingPress supports any of them.
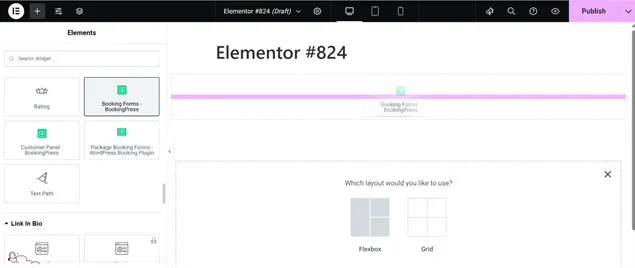
When you are in the editor, simply drag and drop the BookingPress booking widget to the page and publish it.
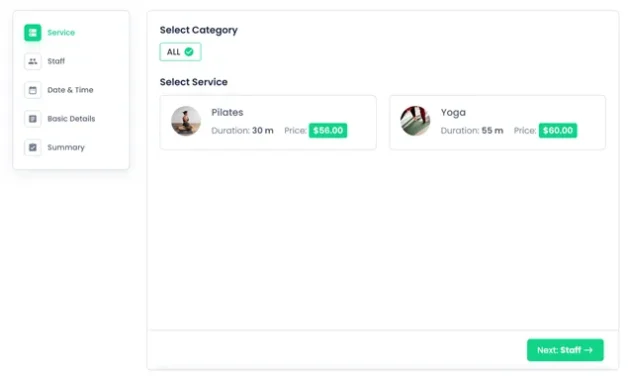
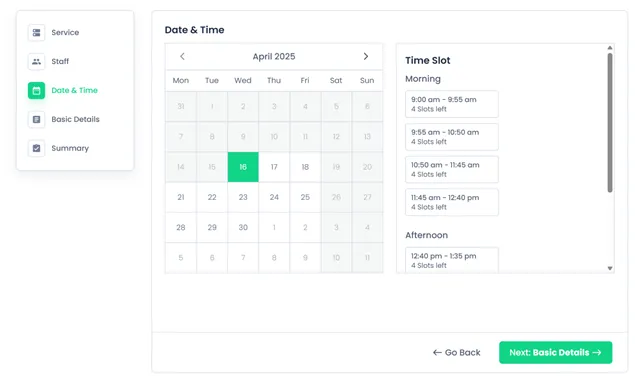
Customers can check the availability of the needed services and make a booking.
Summing up: How to Add an Online Booking System to Your Website?
You’ll find that adding online booking to your website with BookingPress is a really easy and intuitive process. And if you ever get lost, the plugin has your back – it’ll guide you so you can get everything set up just right.
With such a WordPress booking plugin, you will be able to accept hourly online reservations, sell the time of your staff, drive sales for unpopular offerings, and collect money for your work securely. Ready to give it a go? Try BookingPress.
Related articles:


Brian is a WordPress expert with a decade of developing experience & technical-writing. He enjoys blogging, movies & hiking.

Get BookingPress Premium
50+ Premium Addons
20+ Payment Gateways
Plan starts at just $79
Get Premium Now