How to Create WordPress Booking Website With Astra Theme
The days of registering your clients by hand and accepting appointment bookings by phone are long gone.
With the designs available in the tried-and-true Astra theme and a booking plugin, you can create a standout presence for your service business, and start accepting bookings automatically with online payments.
Both the Astra theme and the BookingPress plugin we’ll use in this article are made by design for WordPress. And they work perfectly together.
So in this article, we’ll briefly look at the two main processes involved in creating a WordPress booking website based on these solutions.
How to customize Astra?
Astra is used by more than a million people and is made in a careful way in terms of design and code; this is one of the reasons that makes it so popular among people.
It is provided with tons of professionally crafted designs, so-called starter templates, including for service business. We’ll use one of them to exemplify the creation of a beauty salon or massage website with booking options.

You can be on any version, free or paid, we’ll use free Astra modules and design solutions in this article to serve budget-minded people in the first place.
After the Astra WordPress theme is installed and activated, go to choose your design. Note that you will need to add your license key to activate premium features if you are on Pro.
Step 1. Customize global site settings, for the whole site
This usually included colors, the website width, fonts, and other design essentials that repeat across the site. In a few steps, make all the core design elements similar throughout the entire website.
In your WordPress dashboard, go to Appearance → Customize.
Choose typography for your site

There are multiple settings you can choose to set up consistent fonts across your website. Via the Typography menu, you can set up the font sizes, base fonts for texts and settings, as well as go with pre-made presets.
Pick a color scheme
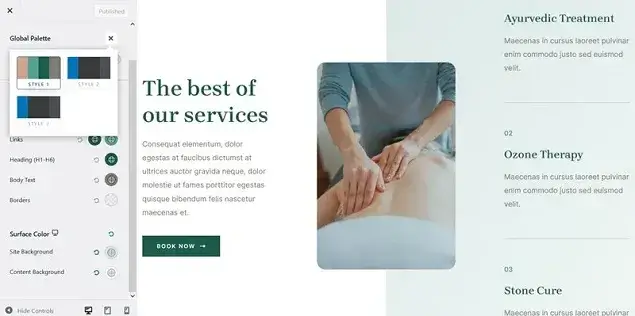
You can choose a color scheme for your website and we must say that Astra is very flexible and extensible in this aspect. You can really accelerate the process by choosing a pre-made color scheme to make all the colors balanced across your booking site with Astra, without much effort.
Go with a preferable website layout
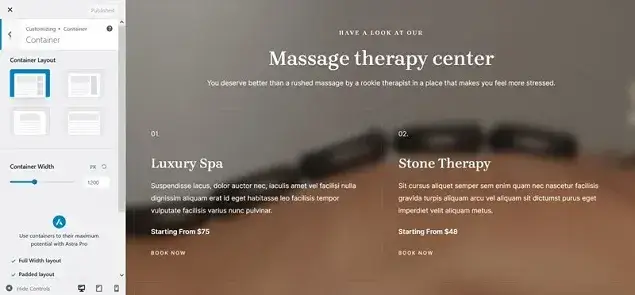
This option in the WP Customizer will help you choose the preferable website width/container. There are a few pre-made options, which are most popular, such as boxed and full-width (stretched and contained).
Decide on button styles
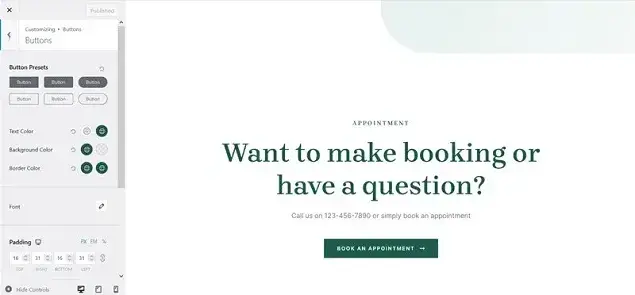
Choose how your “Book now” and other website buttons look by selecting from available Astra button presets. Other tools, such as font, color, and size customizer can help you further modify the look and style of buttons.
Step 2. Customize individual theme parts, such as header (navigation menu), footer, sidebar, etc.
The Astra theme offers numerous categorized settings for this purpose, again they are located in a handy way via the Customizer.
Customize header & footer
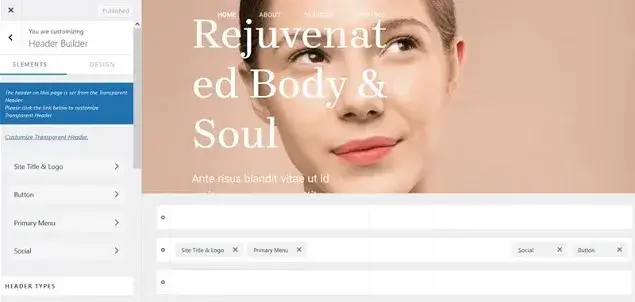
Edit this essential navigation part of your website with a drag-and-drop visual builder. For every menu element, there is a dedicated settings panel that allows you to move, rename, add and delete menu items and widgets. You can also add a social menu with links to your accounts.
You can also add the needed widgets to the footer area, for example, the copyright statement; in the context of your website, that can also be a Book Now button.
Set up a blog
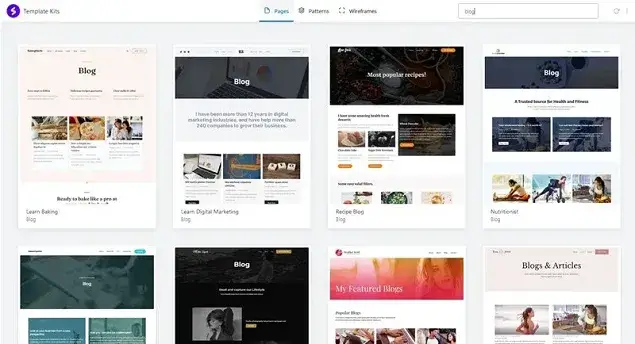
No website will grow and prosper without regular blogging. So to get the most out of this most organic SEO technique for your appointment business by starting with an awesome design and choosing the preferable blog layout. There are tons of pages and patterns you can choose for your blog, plus alter general container and sidebar settings, including for a single post.
Modify more general settings
There is a way more settings you can set up for your WordPress booking website made with Astra. For example, add or remove breadcrumbs navigation, configure performance settings, upload a site title and logo, etc.
All in all, the Astra theme makes it very easy to go about design, whether you edit the global site configurations or individual pages, there are tons of layouts, modules, and widgets to create a booking site of your dream and make edits with your preferable builder, including Elementor and Gutenberg.
How to add a booking widget with BookingPress
The next step, obviously, after you are done with the general website design customizations, is to add an online appointment booking widget for automating appointments right through your WordPress website.
Thanks to the BookingPress plugin, either free or Pro version, it’s a matter of a few simple steps.
This WordPress booking plugin that works with the Astra theme will let you easily add a step-by-step booking wizard, which allows customers to select a service, available time, and then make a booking online.
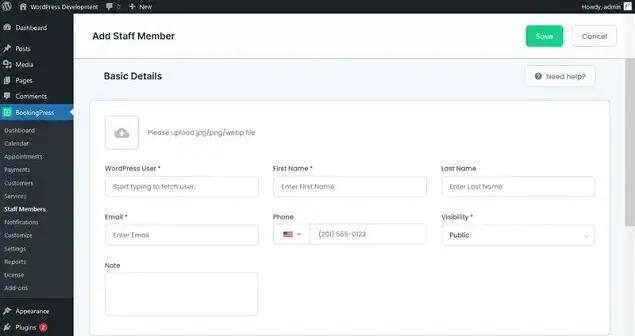
Step 1. Add staff members with optional accounts for them
Your customers can choose service providers when placing a booking online. So add as many providers as needed, optionally allowing them to have WordPress accounts for accessing their clients and scheduled appointments.
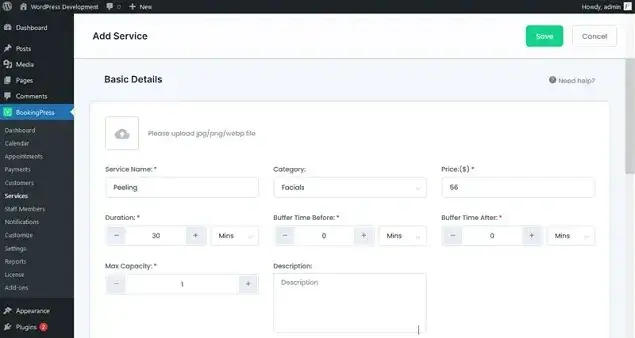
Step 2. Add services of the required duration and price
For every service you add, it’s possible to add a description with an image, duration, cost, buffer time, capacity, available service providers, and more.
Step 3. Go through appointment scheduling settings
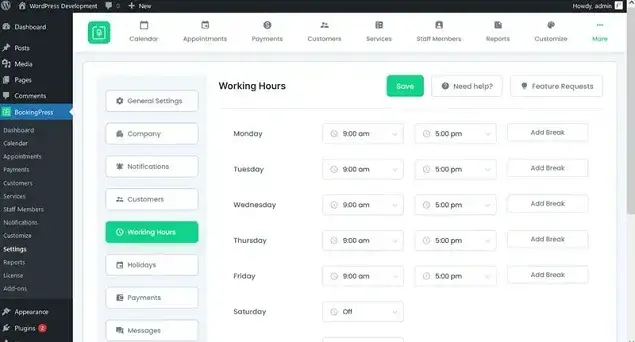
To manage the availability of your staff and business in general, you’ll need to designate your schedule settings, including holidays, breaks, vacations, and regular working hours.
Step 4. Select payment gateways, notifications, etc.
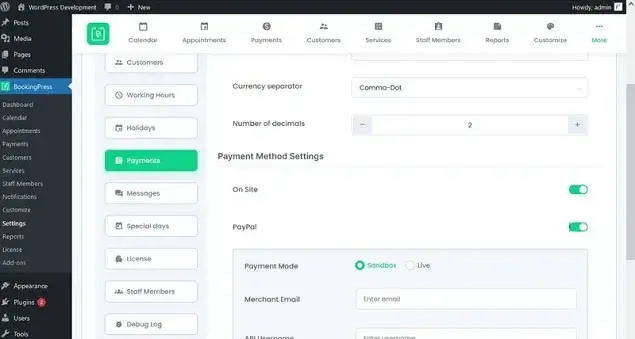
If you want to allow customers to pay online, enable dozens of payment gateways, such as PayPal, Stripe, 2Checkout, Mollie, and more. There are also settings to create custom email notifications to send to your customers (payment methods, deposit payments, coupons, and more).
Step 5. Set up invoices, coupons, and more required functionality
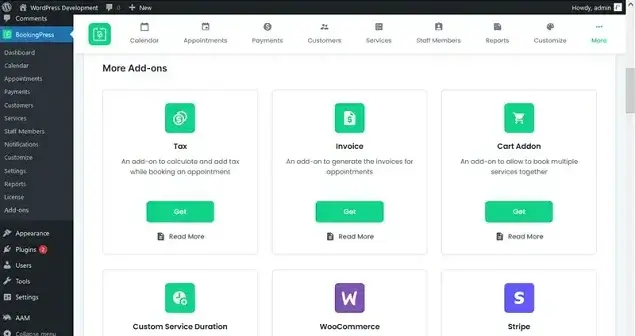
The BookingPress appointment booking plugin is very generous in terms of the essential functionality modules that are usually sold as premium extensions in other plugins. So you can pick any, enable, and customize its settings to your needs.
Step 6. Add a booking widget via Astra
Our next step is to make sure the BookingPress widget is added to your Astra theme and it can function properly. We can do that with a basic BookingPress shortcode in the block editor.
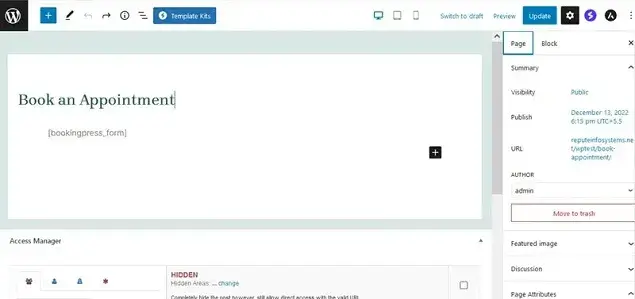
It will bring an awesome mobile-friendly appointment booking widget to the page where you added the shortcode.
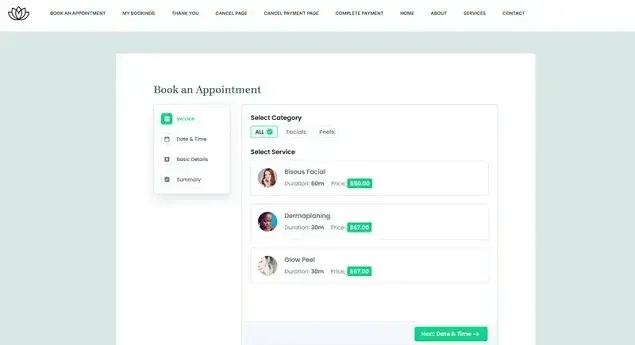
To make it more suitable for your chosen Astra theme design, you can use a different color scheme and layout for BookingPress.
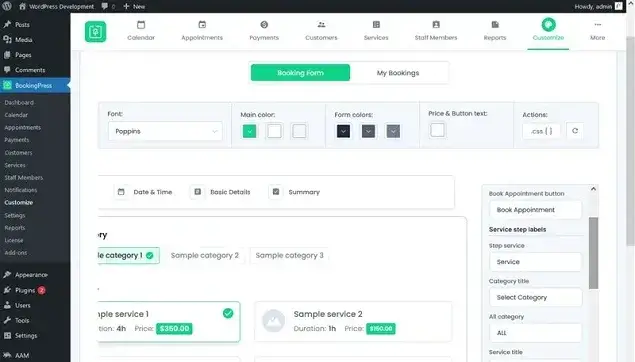
Not your clients can go through this stage to make a booking, from selecting a service to submitting their details, paying and optionally adding an event to their preferable calendar!
Your Astra booking widget is ready!
Then you can manage bookings, view the stats, and manage employees from one dashboard, using the power of the Astra theme and BookingPress together.
Conclusion
Using Astra together with the BookingPress plugin, you are sure to experience little to no limitations when it comes to the design options, integrations, payments, and managing the core aspects of your appointment scheduling business. Get started with either free or Pro versions and pay only as you grow and need more specific options!

Get BookingPress Premium
50+ Premium Addons
20+ Payment Gateways
Plan starts at just $69
Get Premium Now


