How to Enable Two-Way Google Calendar Sync with BookingPress

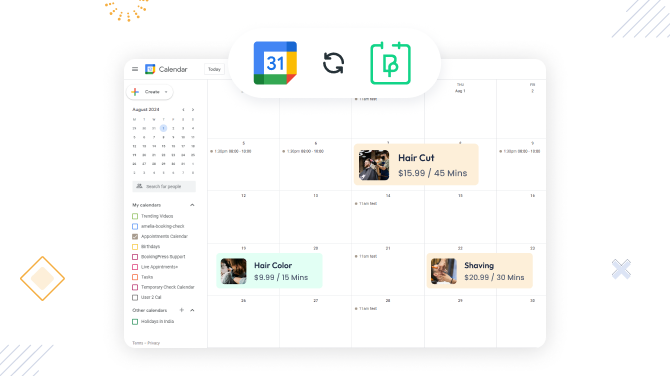
Did you know that your staff can sync their availability managed via BookingPress with their personal Google Calendars? This way, when a booking comes through your WordPress site, it automatically adds a respective event to their Google Calendar, giving them an instant notification.
This means they can set up real-time calendar sync, prevent double bookings, and make control over their availability easier!
Thanks to the seamless, incorporated Google Calendar integration, you can do that for free if you are on any premium plan with BookingPress.
The following is a brief guide to what steps are required to enable Google Calendar with BookingPress:
- Activate Google Calendar Integration from your BookingPress add-on settings on WordPress.
- Obtain your Google Calendar API credentials via Google Console.
- Add those credentials to BookingPress.
- Sign in with individual Google Calendars of your staff to establish connections and enable workers to get appointments to their calendars apps.
For more details, follow the tutorial below – the complete setup can be done in about 30 minutes, so let’s do it!
Step 1. Enable Google Calendar Integration Add-on
As you might know, with BookingPress add-ons, you can enable only those extensions that you need – for a tailored approach!
So if you haven’t installed this add-on yet, do it in your account.
- On WordPress, go to BookingPress > Addons > Google Calendar Integration > Get > follow a link to your BookingPress account. Otherwise, you’ll just need to click ‘Activate’ if you already have it installed.

- Go to Access Passes > View Your Downloads > Find the Google Calendar Integration add-on > Click Download Now.
- Download a zip file with the add-on on your device.
- Install it and activate it via Plugins > Add New.
- Activate the add-on from the Add-ons menu in BookingPress.
The Staff module should also be activated and set up.
Step 2. Obtain Google Calendar API Credentials
Getting your credentials is the most involved step, but the rest is a breeze! Follow these steps.
- Go to Google Console and click ‘Select a project’ or ‘New Project’ if you are creating a new project. We’re creating a new one in this guide.

- Fill in the project name and location and click ‘Create’.
- Click ‘Enable Google API’ > select your project.

- Click ‘Create Credentials’.

- Select ‘User Data’ that will create an OAuth Client > Click ‘Next’.

- Fill in the fields with your information.
- On the ‘OAuth Client ID’ step, select ‘Web application’.

- In Google Console, under “Authorized redirect URIs,” add the URL you find in BookingPress settings (Integrations > Google Calendar > Redirect URL).
- Once you complete all the steps, copy the data from the Client ID and Client Secret fields.

Step 3. Add Google Calendar Credentials to BookingPress
Once you’ve created credentials, you can use them on your WordPress. First of all, establish the connection and then optionally customize data for events.
- Go to BookingPress > Settings > Integrations > Google Calendar > and paste these credentials to the corresponding fields: Client ID and Client Secret keys. Save the changes.

- Optionally customize events data. For details on using placeholders and customizing event data in Google Calendar (how your bookings, service, and staff information will look when sent to the calendar), see our Google Calendar documentation.
Step 4. Connect Staff Calendars
Now, you need to connect staff email addresses to your site.
- Within the BookingPress dashboard, find the “Staff Members” section > select a staff member > Edit Staff member > and access the “Integration” settings in this menu.
- Authorize a staff account by clicking “Sign In With Google” to initiate staff member authorization and grant access to their Google Calendars.

- Upon successful authorization, a dropdown menu titled “Select Google Calendar” will appear. Choose the specific calendar where you want appointments to be synced.
That’s pretty much it – now appointments automatically populate the employee’s Google Calendar upon booking on your site.

Please note:
- Any changes made in BookingPress are updated in Google Calendar.
- Even though BookingPress won’t show events created directly in Google Calendar, those events will still block the time slots on your site.
This Google Calendar integration will additionally help you host online meetings via Google Meet with BookingPress with your clients.
Over To You: Why Google Calendar Synchronization is Important
Why should you allow your staff to connect their calendars to the site where the bookings are happening?
- By syncing your WordPress bookings with staff calendars, you prevent double bookings where an employee is accidentally assigned to two appointments at the same time.
- Staff can instantly see their appointments reflected in their personal Google Calendars, which means a much easier workflow even on the go; they don’t need to log into WordPress to see their assigned appointment!
- Booking sync removes the need for manual appointment management by the website administrator.
More useful BookingPress tutorials:
Brian is a WordPress expert with a decade of developing experience & technical-writing. He enjoys blogging, movies & hiking.

Get BookingPress Premium
45+ Premium Addons
20+ Payment Gateways
Plan starts at just $79
Get Premium Now