General Settings
These General Settings control how your booking system behaves across your complete service website.
You can set all the general settings of BookingPress from BookingPress → Settings → General Settings.
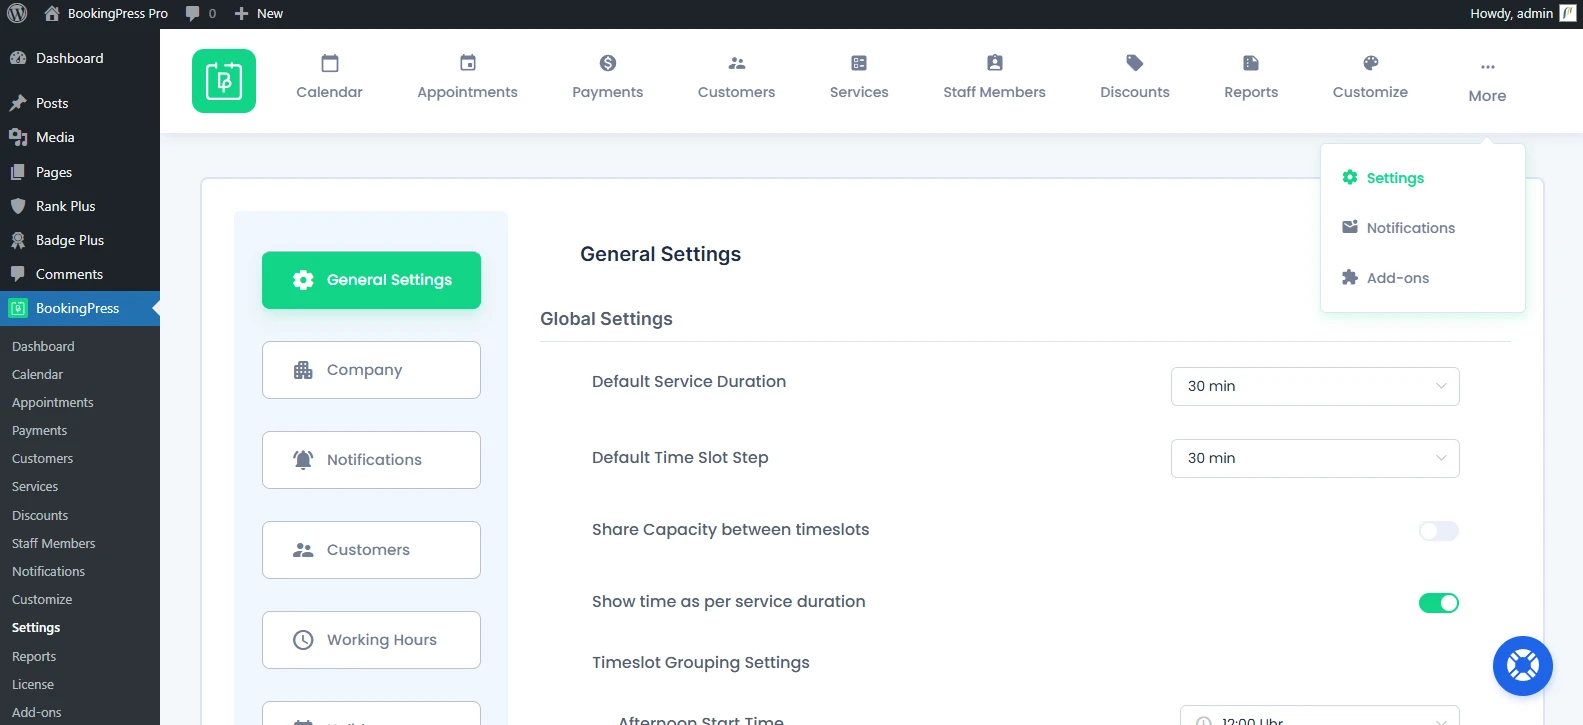
Now, let us walk through each setting available in the General Settings panel.
Default Service Duration
This setting is used to determine the default time slot for services in which (customers can book appointments.)
In simple Words, toggle it on to define the default duration of a service when creating a new service.
For example If you set it to 15 minutes, all newly created services will automatically have a 15-minute duration.
Default Time Slot Step
This setting allows you to edit length for the time slot step. It decides the time slot step in which your appointments can be scheduled.
For example, if you select “10 minutes” as the default time slot step(and your service duration is 30 minutes), the working hours will be divided by 10 minutes of time slots. So, appointments can be booked at
- 09:00–09:30
- 09:10–09:40
- 09:20–09:50
- 09:30–10:00
And so on…
In simple words, customers can book an appointment at the interval of every 10 mins gap.
Share Capacity Between Time slots
This setting controls how overlapping time slots handle availability.
When enabled (ON)
All overlapping time slots share the same availability.
For example if someone books 09:15–09:45, then:
- 09:00–09:30 → slots reduce
- 09:15–09:45 → slots reduce
- 09:30–10:00 → slots reduce
This avoids overlapping double bookings.
When disabled (OFF)
Each time slot works independently.
For example if someone books 09:15–09:45, then:
- Only that slot’s capacity is affected.
- Other time slots that were overlapping that time window will simply disappear.
Thus, you can enable it if you offer 1–on-1 services (doctor, coaching, consulting) or simply disable it if you allow multiple bookings (group classes, events).
Note: You can’t enable “Share Capacity between time slots”, if the “Show time as per service duration” is enabled because then there’ll be no risk of overlapping at all.
Show Time As Per Service Duration
This option allows you to set time slots the same as the service duration. This way you can show time slots based on your service duration.
For example if you have the default service duration of 30 minutes, your time slot will appear like:
- 9:00–9:30
- 9:30 –10:00
- 10:00–10:30
And so on.
In this case, working hours are divided exactly according to the service duration.
Time slot Grouping Settings
Here, you can establish the start times for your Time slot Groupings like this:
- Afternoon Start Time
- Evening Start Time
- Night Start Time
If you set Evening Start Time to 4:00 PM, all slots after that will be grouped under “Evening”.
Default Phone Country Code
i. Identify country code by user’s IP address
By selecting this option, the country code for the phone number can be selected depending on the user’s IP address, from where the user is accessing the site.
ii. Fixed Country
You can set the default fixed country code for the phone number according to the country in which you are providing your service.
Default Items Per Page
This option will help you to select the number of records you want to show in different sections like:
Note that, you can select a maximum 500 entries to view on page and suppose if you have selected 500 entries in “Default Items Per Page”, then all of the sections will view 500 entries as the default number of entries.
Data Export Delimiter
With this option you can select the delimiters between ,(comma) and ;(semi-colon) through which you can divide your data in the CSV file while exporting it.
Default Date Format
This option will help you to select the date format from various options, the default date format will be “F j, Y”.
Default Time Format
With this option, you can select the Default Time Format between 12 Hours or 24 Hours format. If you don’t set anything, the system will by default inherit from WordPress.
Complete Payment Page Selection
This setting decides which page users see when they open a payment link sent by the admin.
The payment link is created using the “Send Payment URL” option, either while adding a new appointment or from the Payments section for pending payments.
This link can be shared via email, SMS, WhatsApp, or Telegram. So, it allows your clients or customers to easily open the page and complete their payment
Show Booking-Slots in Client Timezone
If this option is enabled, then the client will be able to see the slots to book according to their server region time. Apart from that all the activities such as Rescheduling the Appointment, Canceling, Email Notification etc… All the front-end activity at the client side will be calculated accordingly.
Load JS & CSS in all pages
If this option is enabled, JS & CSS will be loaded to every page of the site, and when this option is disabled, then JS & CSS file will only be loaded at the page if there will be any shortcode related to BookingPress.
“Help us improve BookingPress by sending anonymous usage stats” Setting
If this option is enabled, it will share some non-sensitive data like Active Modules or Number of clients using particular payments, and more similar types of data. This will help us understand and make our BookingPress plugin better for you.
Enable Debug Mode
This option, if toggled on, helps us understand and identify the technical issues by logging errors. It’s only used for troubleshooting when you reach us.
BookingPress Loader
In this section, you have the option to select from three predefined loaders. Choosing any of these will replace the default loading animation on the front-end BookingPress form with your selected preloader.
Need a hand?
Our world-class support team is happy to help. Send us a message and we’ll take it from there.