Mailchimp Addon

Mailchimp Integration:
You will be able to setup this opt-in after getting and activating Mailchimp from “BookingPress -> Addons”.
First of all login into your Mailchimp account and click on your profile name to expand the Account Panel, and choose the Account.
Then, Click on Extras drop-down menu and choose the API keys.
You can copy an existing API key OR click on the Create A Key button for creating a new key.
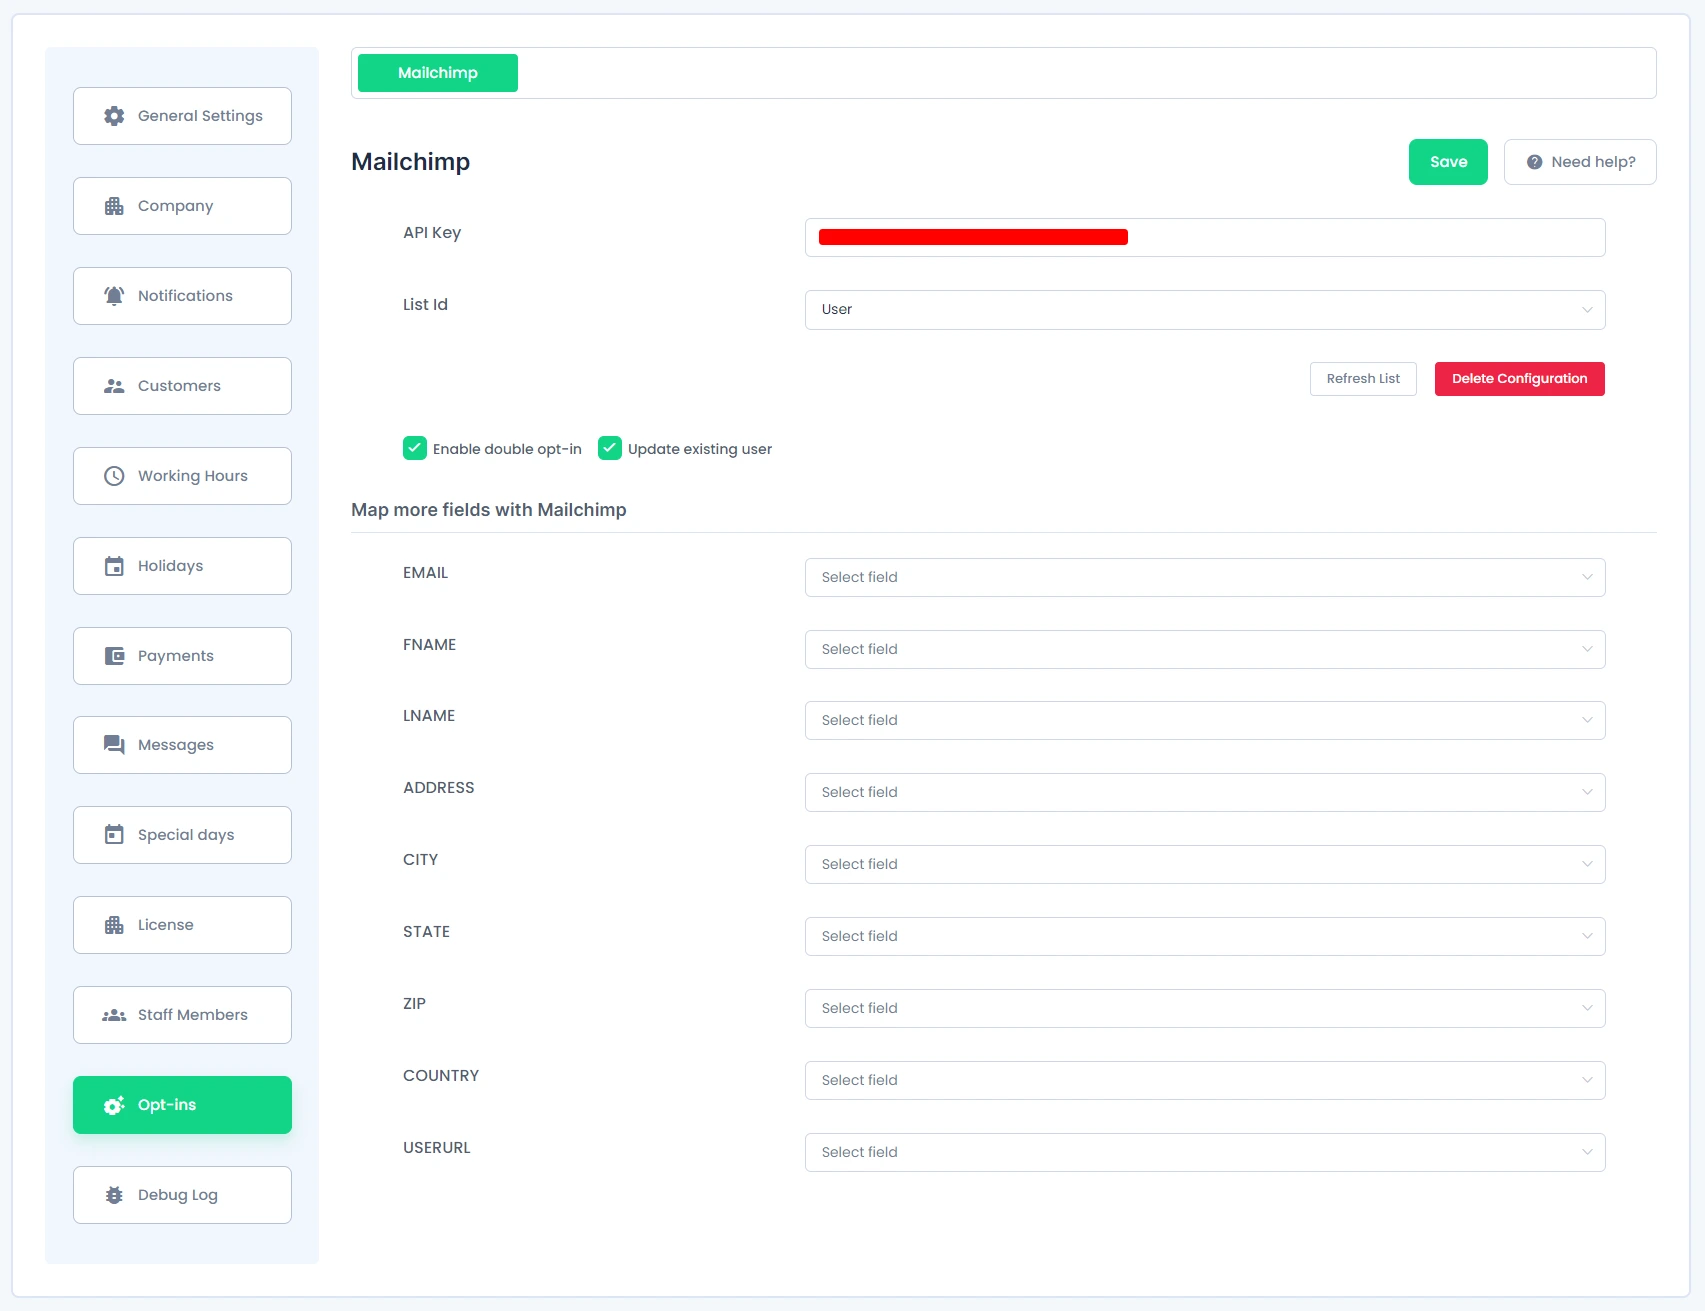
Now go to “BookingPress -> Setting -> Opt-ins” and Enter your “API Key” obtained from your Mailchimp account.
The system will verify your account and fetch all of the list names from your account. Select all of the default List names to add subscribers.
If you want to enable the double opt-in method for Mailchimp, then select the “Enable double opt-in” checkbox.
You can also select the “Update Existing User” option to update the MailChimp data of an existing user.
You can map many fields with Mailchimp by selecting the fields from the “Map more fields with Mailchimp‘ section.

Note :
- You can refresh your list names anytime by clicking the link “Refresh List”
- You can Deactivate the integration of your account with your system by clicking the link labeled “Delete Configuration”.
- Under “Map more fields with Mailchimp”, you will not be able to see or select any the “Checkbox Field Type” options.


